Download Kit
Have you ever built a download page?
Have you every wished building and integration testing all those different OS / Architecture / Package Manager combinations was easier to manage?
Download Kit solves two problems:
-
Workflow management for building and testing binary artifacts across multiple platforms for desktop software release candidates.
-
Don't Reinvent the Wheel - the same frontend components that render your customer download page also render your internal release candidate management tool, whether you're using React, Angular, Solid, or whatever.
What This Is NOT
This is not for managing complex integration testing workflows or large teams with sophisticated CI/CD. This is not for running 50 automated tests to validate a binary.
This is for small teams that need to validate: can I download this binary from my CDN, install it, and run basic smoke tests before customers get it?
Why?
When you have a business distributing desktop software to consumers, you're casting a wide net. Desktop software instead of a web app typically means very few people have the specific problem you're solving. So you need to reach everyone with a computer - using whatever they bought - a mix of Windows and Mac machines. You might support Linux as that's what you used while developing the software.
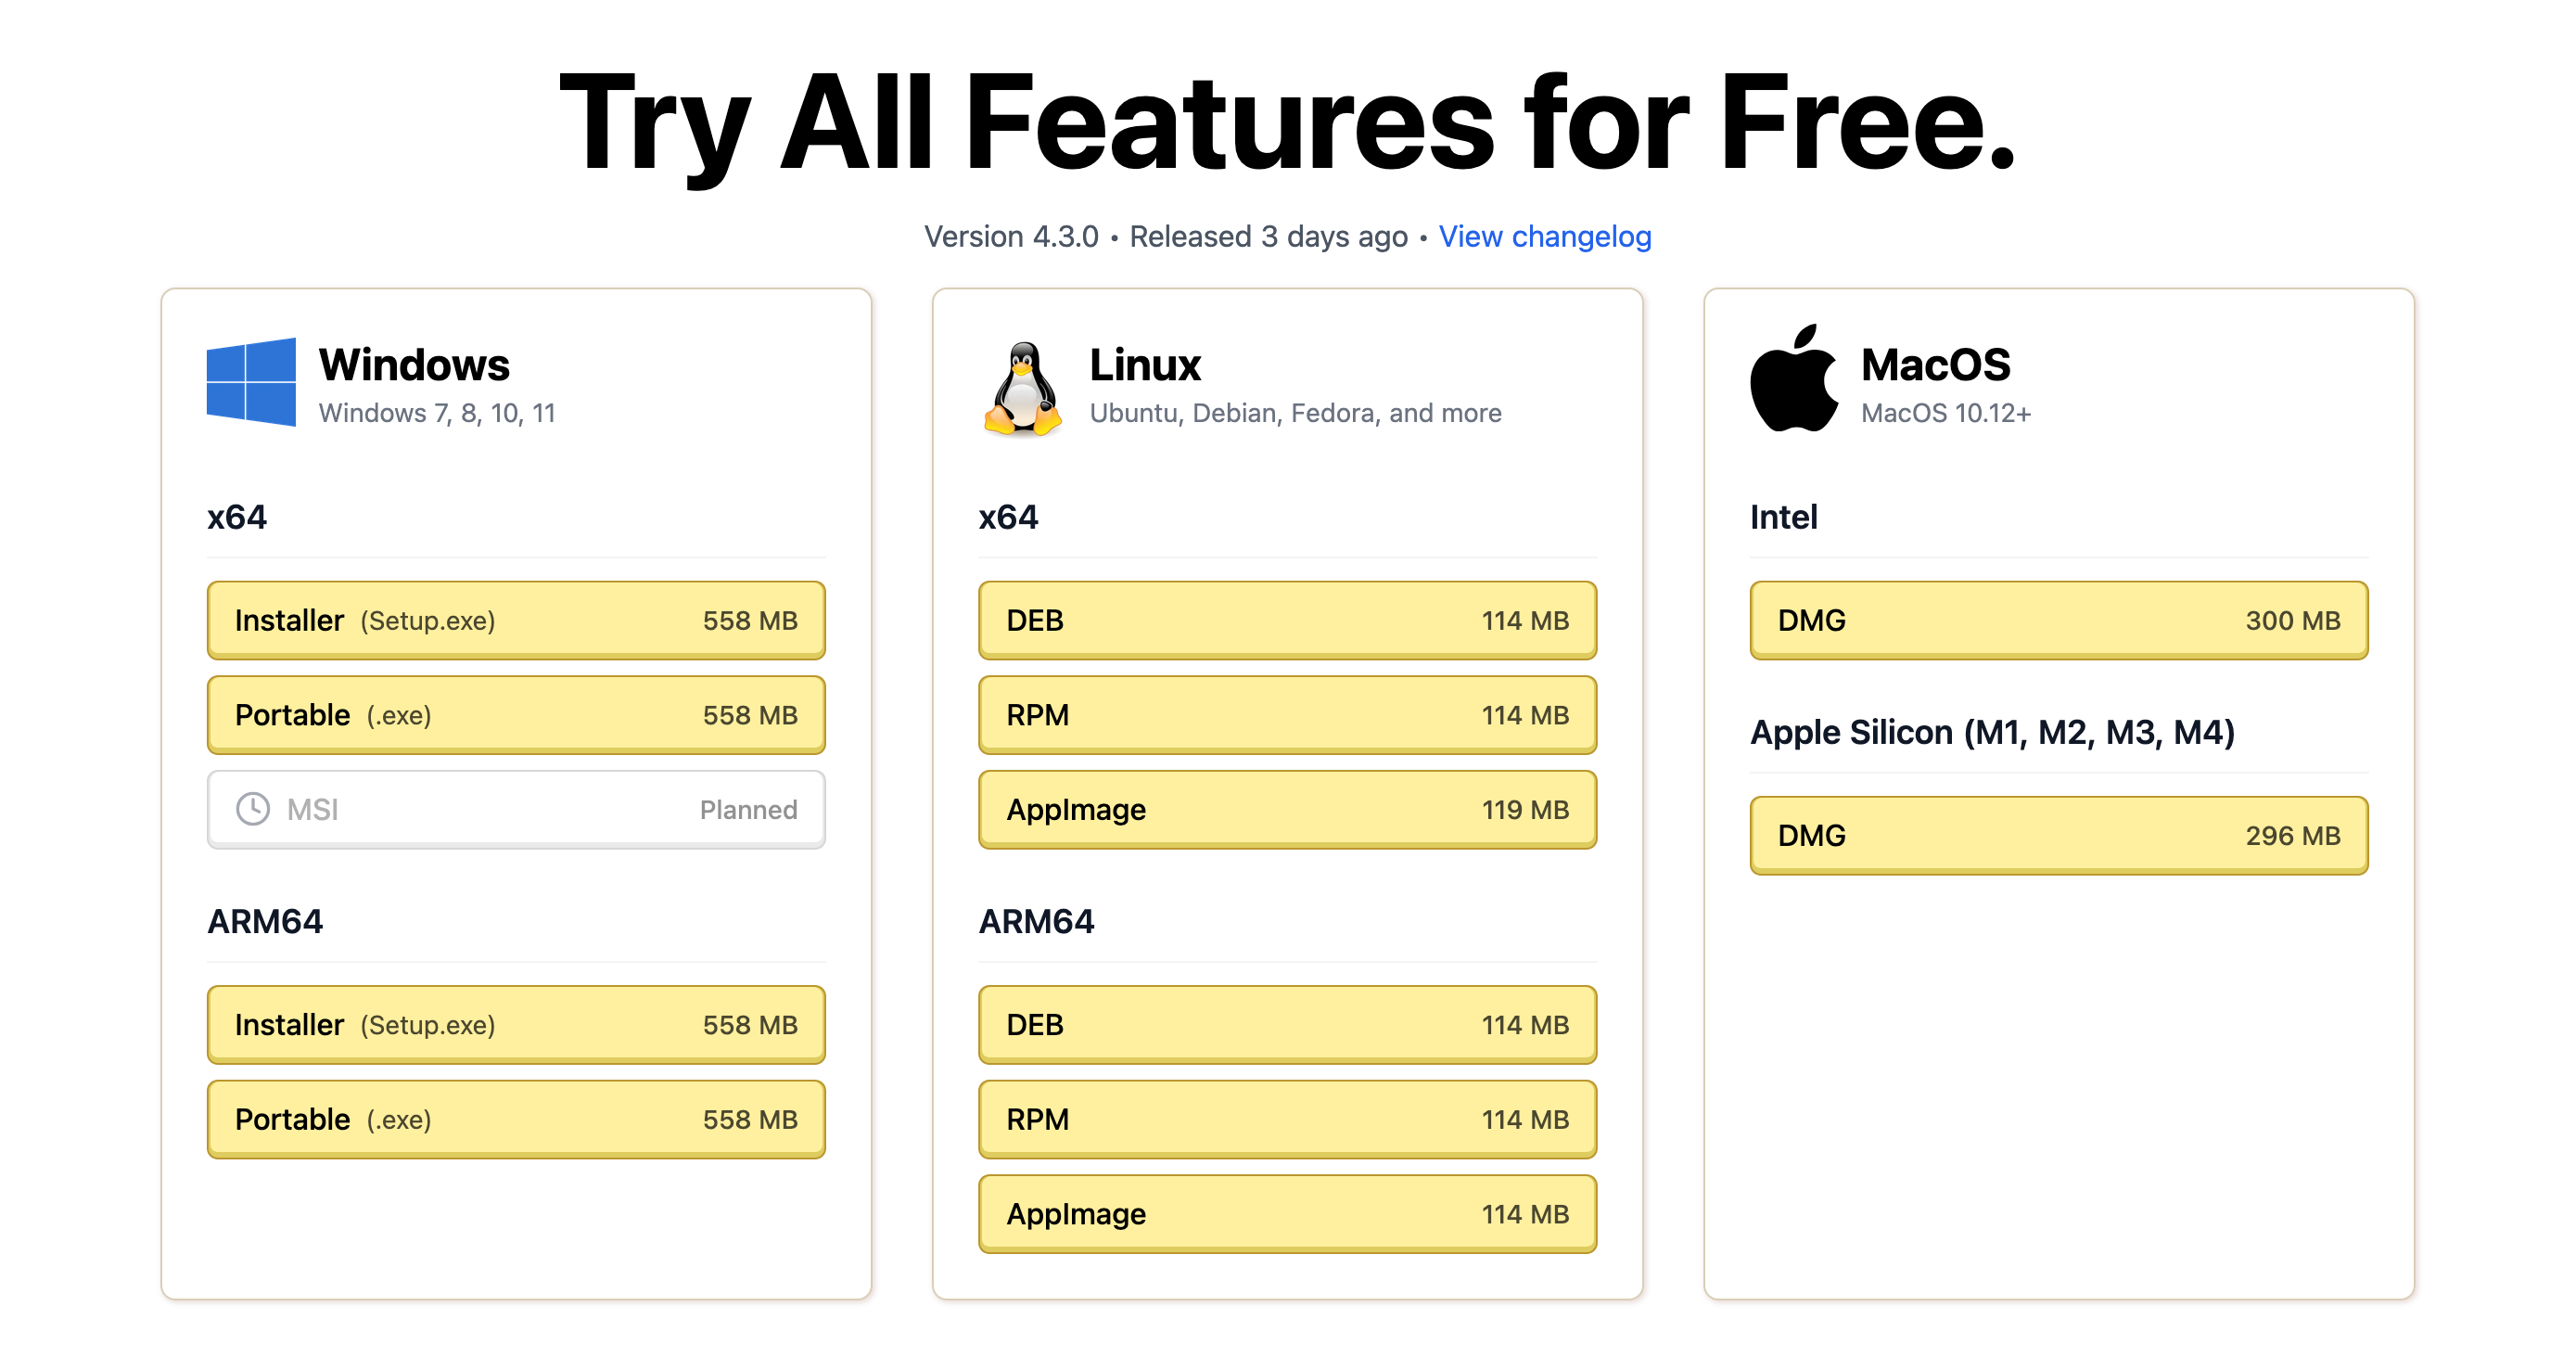
You write code, then you need to build binaries for Windows x64, Windows ARM64, macOS Intel, macOS Apple Silicon, Linux x64, Linux ARM64. Each platform needs different file types. Windows wants both installers and portable executables, macOS wants DMGs, Linux wants AppImages, DEBs, RPMs, and more. That's easily 12+ different artifacts per release.
Your CI/CD handles the "not exists → uploaded" transition just fine. GitHub Actions can build everything and upload artifacts to your CDN or GitHub Releases. But that's not the end of the story.
It's not sufficient to just make the binaries available for download. Especially if you're building for non-technical users, you need to ensure the complete process works: clicking the link, downloading the file, installing it, and running it. You specifically need to put the binaries on the public Internet, because that's the only way to test Windows Defender SmartScreen and macOS Gatekeeper security features. You need to test and verify the same steps your customers will face.
So you put each binary somewhere publicly accessible, then you download it on fresh VMs, install it, run smoke tests. Maybe Windows works perfectly but macOS fails because you messed up code signing. Maybe Linux AppImage works but the DEB has dependency issues.
Now you're tracking more than just "uploaded". You're tracking:
- is this publicly accessible?
- has someone downloaded and tested it installs and runs?
- did these tests all pass or any fail?
You only want to ship a specific commit if every single artifact for every single platform combination passes testing.
Multiply this across 12+ artifacts, and you realize you have scripts running in parallel on several different computers: build scripts, upload scripts, testing scripts. There needs to be a single source of truth about where each artifact stands in the workflow. This is why I added an API to track the state of a release candidate.
All the scripts use the API to update state: "Windows x64 installer build started", "macOS ARM DMG uploaded", "Linux AppImage testing passed". Once the process of building and testing all these artifacts takes longer than five minutes, you can no longer justify doing this manually every day. It needs automation, and that's why there's an API to enable that automation.
The Workflow Model
Each artifact progresses through states:
Planned → Building → Uploaded aka Not Tested → Testing → ✓ Pass
                                                       → ✗ Fail
You can have mixed results - a release candidate might work on every platform except Windows. Individual test results are tracked with optional report URLs.
export type Artifact =
  | { type: "Planned", kind: string, filename: string }
  | { type: "Building", kind: string, filename: string, build?: URL }
  | {
    type: "Uploaded" | "Testing" | "Passed" | "Failed",
    kind: string,
    filename: string,
    build?: URL,
    download: URL,
    sizeBytes: number,
    note?: string,
    tests: Array<
      | { type: "NotAsked", name: string }
      | { type: "Running" | "Passed" | "Failed"
        , name: string
        , report?: URL
        }
      >
  }

type ReleaseCandidate = {
  commit: string;
  version: string;
  created: string;
  channel: string;
  changelog?: URL;
  platforms: Record<
    string,
    { archDisplayName: string; artifacts: Artifact[] }
  >;
};
The workflow is deliberately flexible:
- URLs are arbitrary - build and download URLs can point anywhere. Building on GitHub Actions and uploading to GitHub Releases? Totally fine.
- Tests are optional - you can script a state transition straight from Building to Pass if you don't need download testing. Skip over the "Uploaded" or "Testing" states entirely.
- Test data is just pointers - tests have a name and optional URL. Link to a test report, instructions, or whatever. This data structure just points to your existing testing process rather than trying to replace it.
Component Reuse Strategy
"Why reuse download page components for internal tools?"
Because you've already solved the hard design problem: how to clearly present multiple download options to users. Your public download page layout communicates platform choices, file types, and sizes in a way that makes sense to customers.
Why build separate admin interfaces when you can make those same components render workflow states? Your internal release candidate page becomes a preview of exactly what customers will see. As artifacts move through the workflow - planned, building, uploaded, tested - you watch the page converge toward the final customer experience.
This isn't just code reuse, it's design reuse. The spatial layout that helps customers understand their options also helps you understand release progress.
What's Included
The core is a programming language independent API definition with type definitions generated for TypeScript, Go, Python, and Rust.
Everything else is concrete implementations:
- Two server implementations - standalone Go server and CloudFlare Workers (TypeScript)
- SDKs for build scripts - Go, Python, Rust, Ruby clients for the API
- Example component library - download page components for React, Angular, Solid, Qwik. This is actually my real component library that I use in production, not just a demo.
- Example projects - complete implementations showing how to integrate the components into both public websites and internal release candidate management tools
The goal is to provide enough context and examples that you can hand this to an LLM coding agent and say "make our download page use this API" and it will be able to modify your existing components. The server code works as-is if you want to use it.
Usage
For a new project, use the server implementation and SDKs. Look at the example UI components (about 200 lines of code) and adapt them for your branding.
Since my projects all use the same branding, I include my specific UI components as examples in this monorepo.
Get Download Kit
This used to be the kind of project I'd put on GitHub with a permissive license.
But I'm not happy about giving my work away to large corporations who'll use it to train AI models without giving anything back to the community.
Community Source Model
Instead, I'm sharing this with individual developers and small teams who agree not to redistribute the code to large corporations. Think of it as open source within a community of people who respect the work.
Commerical use allowed, completely free. Basically just don't make the code or any modifications available to the public.
What happens next?
- I'll send you the license agreement (it's reasonable, I promise).
- Once you agree, you get access to the private Git repository
- Full source code, examples, and documentation included
Email Request Access
Join Discord & Request Access
Join our community server and request access in the #access-requests channel.
Join Discord Server